How to Design A Watch with Illustrator
As we know Adobe Illustrator is a designing application. We can design anything with Adobe Illustrator. Even we can design any kind of product. As a product today we will try to design a watch with Illustrator. I hope all of you will enjoy the tutorial. So let’s start our work.
Document Area Setup:
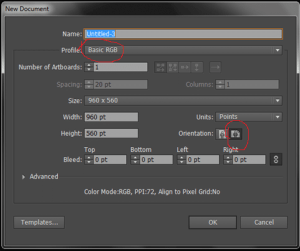
At first setup, the artboard with basic RGB profile and orientation will be landscape
Creating Shapes:
Take the rectangle tool Click on the art board in the dialogue box and put a value of 0.25 for width and 0.4444 for height.
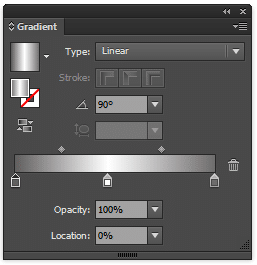
Apply a gradient color to the rectangle
Gradient type: linear
Angle 90%
Gradient Node or color stop will be three
First stop from the left location 0%, color #615E5F
Second stop location 50%, color #ffffff
Third stop location 100%, color #615E5F
Make another rectangle with the value 0.4444 for width and 0.4444 for height.
Apply a gradient color to the rectangle
Gradient type: linear
Angle 90%
Gradient Node or color stop will be three
First stop from the left location 0%, color #615E5F
Second stop location 50%, color #ffffff
Third stop location 100%, color #615E5F
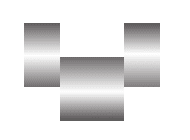
Now Place the two rectangles side by side but for the second one the big one has to be placed half down from the small one
Now copy the small shape and place it at the same alignment beside the big shape.
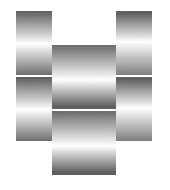
Now group all three shapes select all Ctrl+A and for group Ctrl+G. Now copy the group object by Alt Draging.
Now copy it more than four or five by pressing Ctrl+D.
Finally, we have got the chain for the wristwatch. Now we shall make the main watch. To do so we have to take the ellipse tool and click on the art board in the dialogue box put 1.85 in for width and 1.85 for height.
Apply a gradient color to the rectangle
Gradient type: linear,
Angle 90%
Gradient Node or color stop will be three
First stop from the left location 0%, color #615E5F
Second stop location 50%, color #ffffff
Third stop location 100%, color #615E5F
Now copy the ellipse in the front of the previous one to do this select the ellipse and press Ctrl+C and Ctrl+F to paste in front. Now make some small the copied ellipse by holding the Alt+Shift key. Now change the gradient color of this ellipse.
From the gradient panel just drag down the first color stop and change the location of the middle color stop to 0%.
Now copy it again the previous way and make it something small following the previous steps Finally change the gradient type from linear to radial. This is the final dial of the watch.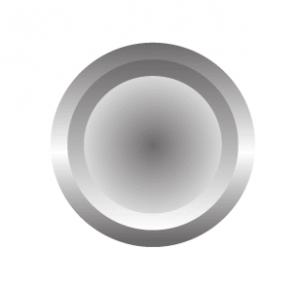
It is time to join the dial with the chain for that we have to make another shape. To make this shape we will take a polygon tool and draw a polygon. Now we shall delete two anchor points with the delete anchor point tool from the top portion. Now an anchor point has to be added at the top line of the half polygon After that we have to make this anchor point smooth and curve the top line down. Finally, we have to adjust it with the dial and chain.
Now it is time to set the time indicator. Set horizontal and vertical guidelines at the center of the dial. Draw a line as a time indicator following the vertical guide line finally, we will copy it. Now select the line with the selection tool then take the rotate tool click the intersecting point of horizontal and vertical guide lines holding the Alt key a dialogue box will appear where you can set the angle degree, in the angle value box type -6 and click copy now you have two lines we need more 58 lines for make it 60 to do this press Ctrl+D until it reaches it 60.
Now just make hour hand, minutes hand.
To see this tutorial at Youtube

