
configure samba server step by step
As a LINUX administrator. When you think Windows Server , You should also think Samba Server. Samba is a great technology that you can run on Linux allowing you to communicate and interact with Windows server and client.
Samba server uses the CIFS/SMB protocol is commonly brought up when you want Linux and Windows machines to able to shear files together. Aside from the file shearing uses, Samba also has some built-in functionality to run as member server on a Windows domain, print server, or file server.
Let’s get started with the setup.
Installing and Configuring SAMBA SERVER.
Step-1:
- Yum process enable
- Hostname setting
- Profile update
- IP setting
- Iptables Flash
Step-2: Install the required package for Samba.
# yum □ install □ samba*
Note: This package contain four sub packages.
Note: There are also a handful of configuration files.
/etc/samba/smb.conf [Contain the main configuration file]
/etc/samba/smbusers [Maps Samba and Red hat users]
/etc/samba/smbpasswd [Contain samba user passwords]
Step-3: Create smbpasswd file for as a container’s to store Samba User’s password.
# touch □ /etc/samba/smbpasswd
Step-4: Create a group for Samba server.
# groupadd □ samba-group
Step-5: Create some directory for shear publicly and personally.
# mkdir □ /backup
# mkdir □ /all_user
Step-6: Create some user for Samba Resource access from Windows Client.
# useradd □ -g □ samba-group □ -d □ /all_user/rashed □ -m □ rashed
[User create with group and home location name]
# useradd □ -g □ samba-group □ -d □ /all_user/rifat □ -m □rifat
[User create with group and home location name]
Step-7: Set password on user’s rashed and rifat.
# passwd □ rashed
# passwd □ rifat
Step-9: The user’s add for Samba Server.
Syntax: # smbpasswd (option) username
Note: option -a for add a user
-d for disable a user
-e for enable a user
-x for deletes a user
# smbpasswd -a rashed
# smbpasswd -a rifat
Step-10: Edit main configuration file for shear directory.
# vi □ /etc/samba/smb.conf
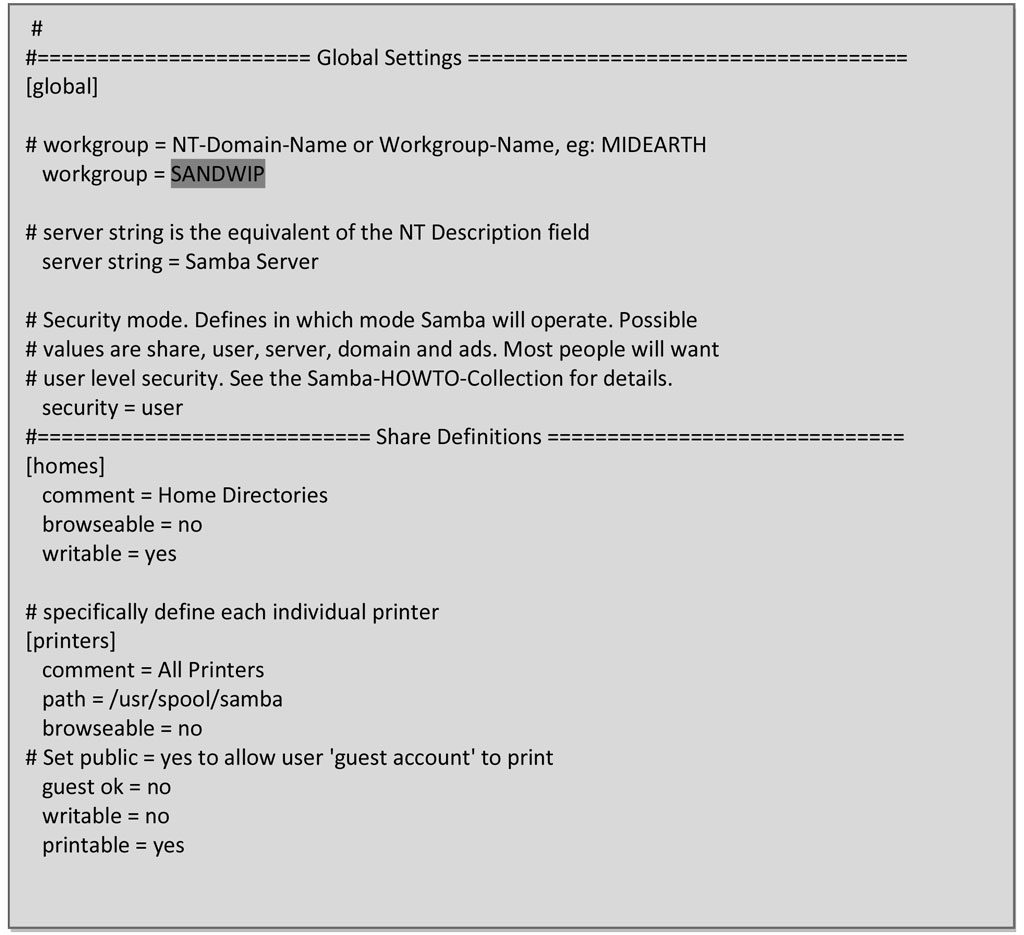
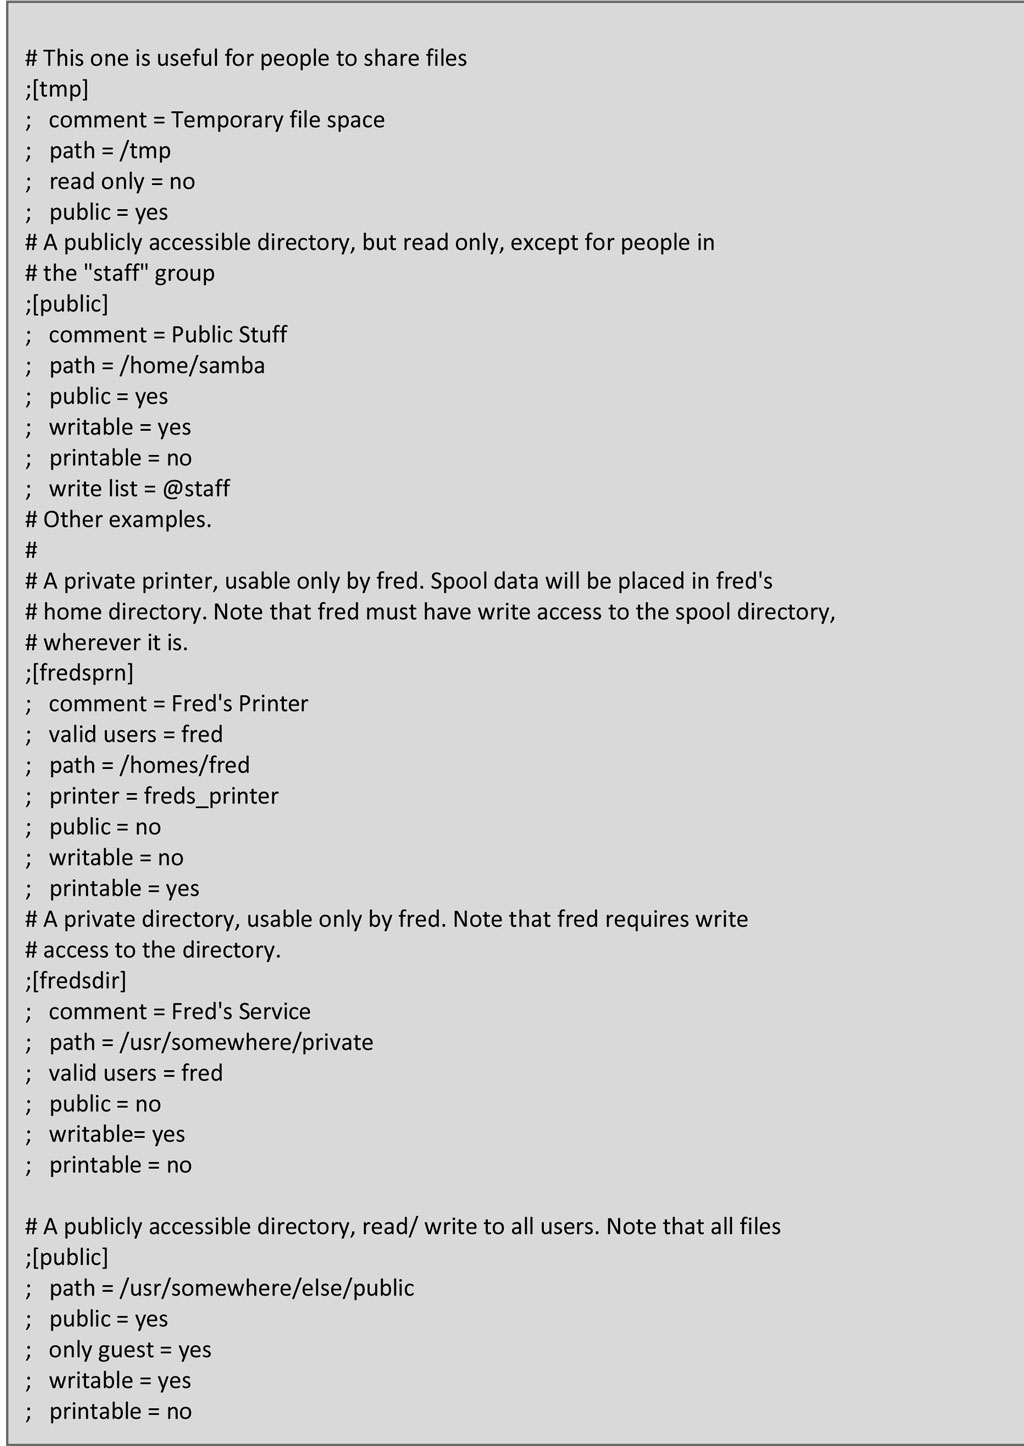
Step-11: Now save and exit the file /etc/samba/smb.conf.
Step-12: Start Samba service (smb) with IP tables flashing.
# service □ smb □ restart
#service □ portmap □ restart
# iptables □ –F
# service □ iptables □ save
Step-13: Enables Samba (smb) for when Linux Up than smb Up.
# ntsysv
[The End Samba server configure with Workgroup without Domain]
Windows work station configuring as Samba client.
Step-
- IP Setting
- Firewall off
- Workgroup Name Change as Samba group ( SANDWIP)
- Access shear directory from windows Desktop Network place Or Network(Double click)
(And see Linux hostname) linux100 (Double click) And see Samba shearing directory.